
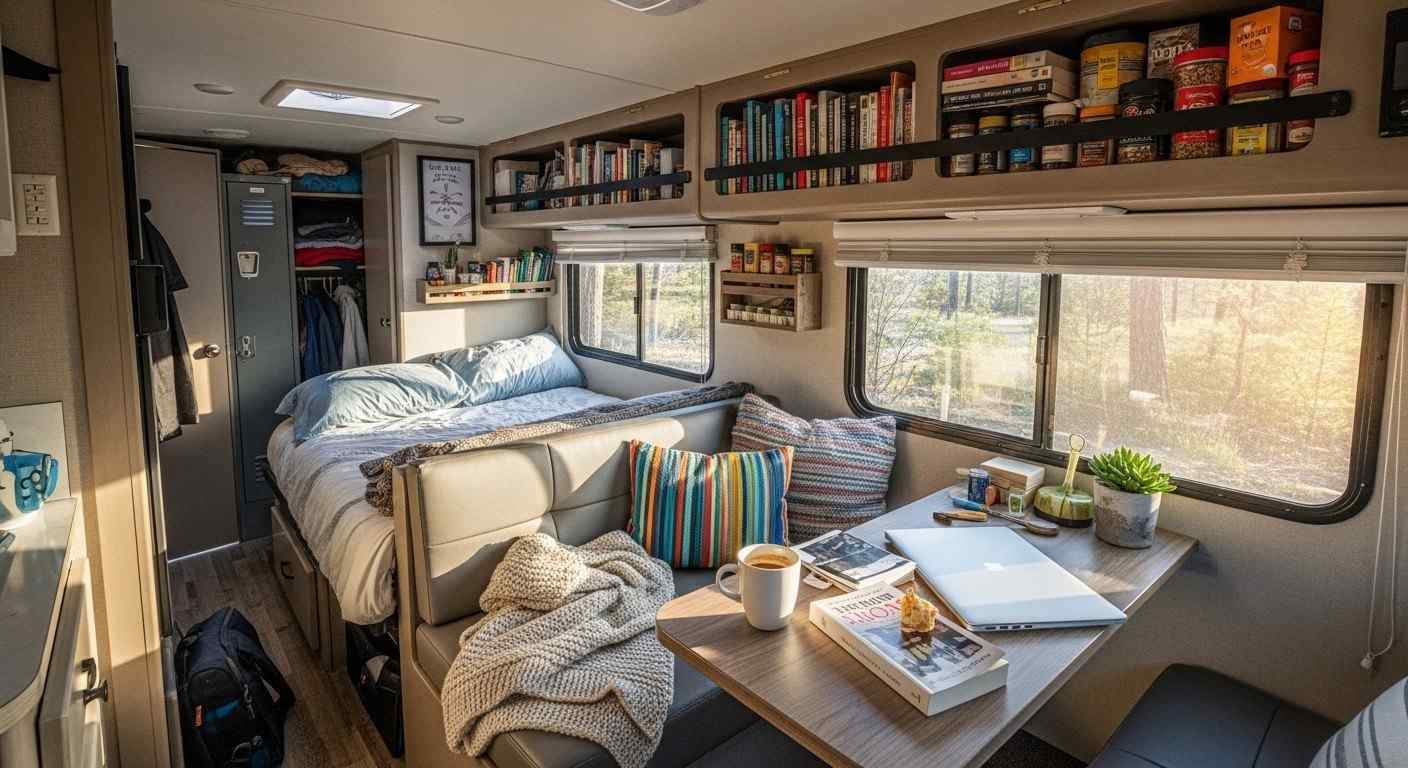
Space is the ultimate luxury in an RV. Every inch counts, and having furniture that only does one thing can make you feel like you wasted your money. If you’ve ever tried to fit a makeshift comfortable sleeping setup next to a functional living area and failed, you are not the only one. In fact, that is the biggest frustration that RV owners have in common.
That is why making a DIY RV sofa bed is such a great idea. Instead of getting a piece that is too wide, too short, or the wrong shape from the store, the fact that you are building it gives you complete control. You decide the size, the materials, the look, and the style. So, you get a bespoke piece that fits beautifully into your space, costs only a small fraction of the retail price, and can even increase your RV’s value when you sell it.
This article is a comprehensive reference for the DIY RV sofa plans that you can make a reality and brings together all the elements covered, such as a list of materials, tools, a straightforward five-step assembly process, a few tips for travel security, and consideration of the comfort factor.
Reasons to Make a DIY RV Sofa Bed
The furniture that you live with in an RV has to be able to do double duty. A sofa that can be turned into a bed solves the need for the furniture to have more than one function in a very neat way, but the store-bought options are hardly sufficient to accommodate the peculiarities of your personal layout. Slide-outs, slanting walls, and awkward floor fixtures imply that standard sizes are often not enough.
Making your own changes everything. The average money invested in a DIY RV sofa bed build can be from $200 to $500, depending on materials, while a similar unit can be bought in the store for $800-$2,000 and even more. Apart from saving money, it is your own design that you are making to exact measurements, your choice of foam density, and your preference for upholstery fabric. Such a degree of customization is simply not present in ready-made furniture.
Comfort aside, there is also a practical benefit to a well-built and well-fitted sofa bed, which will represent master craftsmanship—a quality that can attract more buyers and thus a higher price when you decide to sell.
What You Need: Materials & Tools
Don’t even think about cutting your first piece of wood before you have collected everything. Having the right materials will make the project go as smoothly as possible.
Materials:
- 2×4 or 2×6 wood (for the frame)
- ¾-inch plywood (for the base and seat platform)
- High-density foam (4–6 inches thick for the seat/sleeping surface)
- Durable upholstery fabric (vinyl, canvas, or microfiber is great in RVs)
- Heavy-duty piano hinges or folding bed hinges
- Screws, wood glue, and angle iron braces
- Foam adhesive
- Staple gun and staples
- Optional: piping cord, buttons, or other decorative trims
Tools:
- Circular or miter saw
- Power drill and different drill bits
- Measuring tape and plastic square
- Sandpaper (120 and 220 grit)
- Upholstery staple gun
- Electric carving knife or foam cutter
Where to buy: For most of the hardware and wood materials, you can just go to Home Depot or Lowe’s. Foam is available in various densities and sizes at competitive prices at online shops like Foam Factory or FoamOrder. You can get fabric from upholstery shops or local craft stores.
Smart budgeting advice: Besides lumber and foam, all other materials are considered small purchases. Get the rice for foam first since it easily costs $ 80 – $ 150 depending on size and density, so it is better to have a clear idea before you start.
DIY RV Sofa Bed Step-by-Step
Step 1 – Plan Your Space
One of the main things that determines the success of your RV furniture woodwork is measuring correctly. Width, length, and height of the area to be measured at least two times.
Allow for fully extended slide-outs and write down the wall fixtures, electrical outlets, or floor anchors that will determine the positioning of your furniture. Draw a simple floor plan before cutting any wood. A sofa bed that is longer than the width of the folding panel door by even an inch will not fold, or, worse, it may block the door of a cabinet.
The usual size for an RV sofa bed is approximately within the range of 50–72 inches in width and 28–32 inches in depth; however, it is your room that should really decide the final numbers—not a template.
Step 2 – Frame
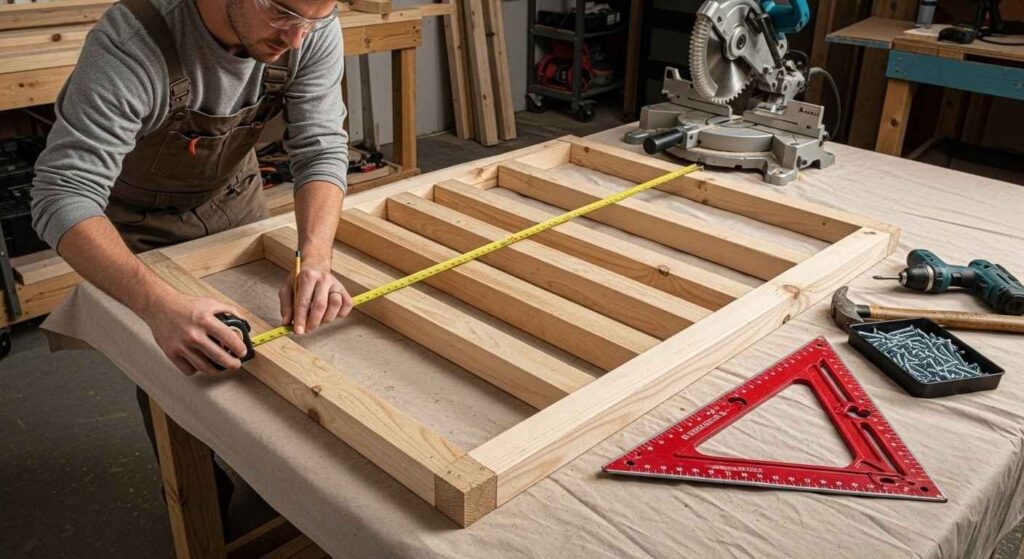
The first step is to take a rectangular piece of 2×4 lumber and form it to base measurements by making cuts along the length and the breadth. Before screwing the corners together, the metal brackets should be reinforced and glued with wood. Screw fixing with this combination leads to an impressive strengthening of the joint over a period of time.
To make the plywood base, cut your ¾-inch panel so that it is perfectly aligned with the frame. The foam mattress will be placed on this. Sand the edges to make sure the fabric will not get torn while upholstering. If the sofa is to be a stand-alone one, legs should be attached too, first leveling the 4×4 posts and then attaching them.
Besides that, you may want to take off some pressure by reinforcing the frame rails twice along the long sides. RV furniture can withstand a lot of wear and tear because of the vibrations that are caused by the road.
Step 3 – Install the Joint
The joint is the folding mechanism, which allows you to transform your sofa into a bed easily—but it must be very reliable. A piano hinge is the most secure solution that you can use for a camper sofa bed DIY. If you want a cleaner and more finished look, heavy-duty folding bed hinges with a locking position are great, and they can withstand regular use without getting loose.
The hinges are to be put on the underside of the fold seam so that they remain invisible when the sofa is in the upright position. Do several tests on the fold before upholstering so that you can be sure it opens and closes without any problems. You’ll save yourself a lot of pain later if you get your hinge placement perfect before adding the foam.
Step 4 – Investing in Foam that Works for You and Your Sofa
Choosing foam needs to be carefully considered as to whether you like the sofa to be comfortable or not. For best results, use high-density foam for your RV sofa bed with a density range of 1.8–2.0 lbs per cubic foot. Such a density not only keeps its original volume but also provides both a comfy sitting and sleeping area.
A thickness of 4 inches is sufficient for casual sitting, but if it is going to be a primary sleeping surface, then 5-6 inches is a better choice. For the back cushions, the middle density of the foam at 3-4 inches is the most comfortable without making the sofa too large.
You don’t need to go for professional tools when you want to cut foam at home, but an electric carving knife or a serrated bread knife along a straight edge should do just fine. Mark cut lines with a marker and ensure that you make the passes slow and steady for neat edges.
Step 5 – Finish
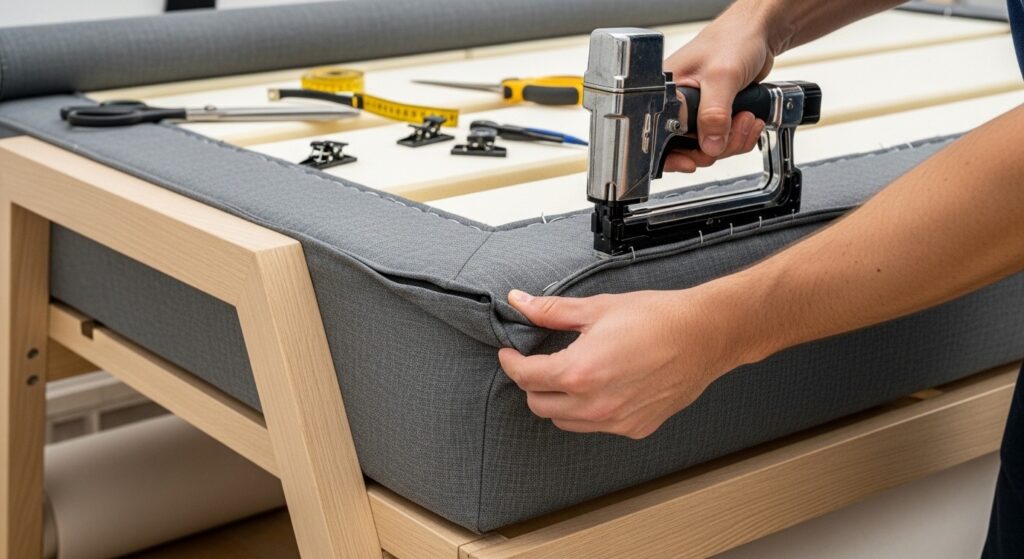
Material selection for the sofa can turn out to be just as or even more important than in an ordinary house. Apart from normal wear and tear, the fabric should withstand UV rays, humidity, and frequent use. Microfiber is softer, so that is why it requires more maintenance when in a high-moisture environment, but vinyl and outdoor canvas are the most durable options.
Put the fabric on the floor with the outer side down, place the foam-covered platform on top of it, and, pulling the fabric tightly, staple it every 2-3 inches along the bottom. Start in the middle of one side and continue outward to avoid gathering. Corners should be folded as if it were a gift—clean, tight, and flat.
Adding the piping at the seams or doing the buttons on the cushion by hand for a tufted effect is a neat trick to whisk the whole thing up. These simple little chores take the result from merely functional to really nice.
Safe Travel Practices
If the furniture is not securely fastened, it may not stay in place while driving. If the driving area is not secure, the sofa can move around, fold in on itself, or become a hazard in case of an accident.
Here is what to do:
- Safety latches: Put in a bolt latch or a hook-and-eye closure so the folding part is locked in the upright position during the drive.
- Non-slip pads: Under the sofa legs, put some rubber mats that will prevent the sofa from sliding even on a smooth floor.
- Floor anchoring: If it is a permanent piece of furniture, then the frame can be directly attached to the floor of the RV using L-brackets and suitable fasteners for the type of floor.
Also, don’t forget to check the RV manufacturer’s instructions for furniture installation—some models require securing of aftermarket fittings.
Building a sofa bed at home is just around the corner!
Making a DIY RV sofa bed is one of those things that seems quite complex at first glance, but once you divide it into steps, it becomes very feasible. Measure properly, construct a sturdy frame, put in good hinges, get the proper foam, and finish the sewing of upholstery—that is it.
You will always use this custom piece of furniture/lounge bed fitted for the space that costs you only a small fraction of what it is worth retail-wise. No other deal is better than that.
After the completion of your project, posting pictures on social media and tagging us would be great—we truly love seeing what our community creates! How about getting going now? Grab our free printable material list or visit our website for more of such DIY RV furniture inspirations.
FAQs
How much does a DIY RV sofa bed cost?
It depends chiefly on the quality of lumber, foam density, and fabric selection. But most times, the building cost ranges between $200 and $500. If you are getting the materials from online shops, the prices tend to be lower.
What type of foam is best for an RV sofa bed?
A high-density foam of 1.8–2.0 lbs per cubic foot is perfect. It can resist the deformation due to frequent use and also provides a comfortable surface to sit or sleep on.
How should I make a sofa bed for a small RV?
Take detailed measurements of the space you’ve got, and don’t forget the slide-outs and fixtures that are fixed. The build should be to your measurements, not the standard sizes of furniture—this is basically the main advantage of the DIY method.
Do I need carpentry experience to do this?
Basically, you only need to know how to use a saw and drill; however, the construction is easy enough for a confident beginner. Take time to measure and build the frame; the rest of the steps are quite logical.