
When looking at an attractive double-height room, your first thought may be, “How on earth am I going to do this? This ceiling is so high!” If you have the correct equipment and a sound safety plan in place, you will be able to attack this task with confidence and will end up with professional-looking results.
This tutorial will take you through all of the steps and show you tricks for different parts of the job. For example, it will tell you how to choose your equipment, how to prepare the walls for painting, and even how to paint near the ceiling if you are using a pole roller for the first time. It doesn’t matter whether you are up for a challenge in painting a massive double-height entrance hall or a double-height dramatic living room; you will learn the technique and be the master of height.
Essential Tools and Equipment for Painting High Walls
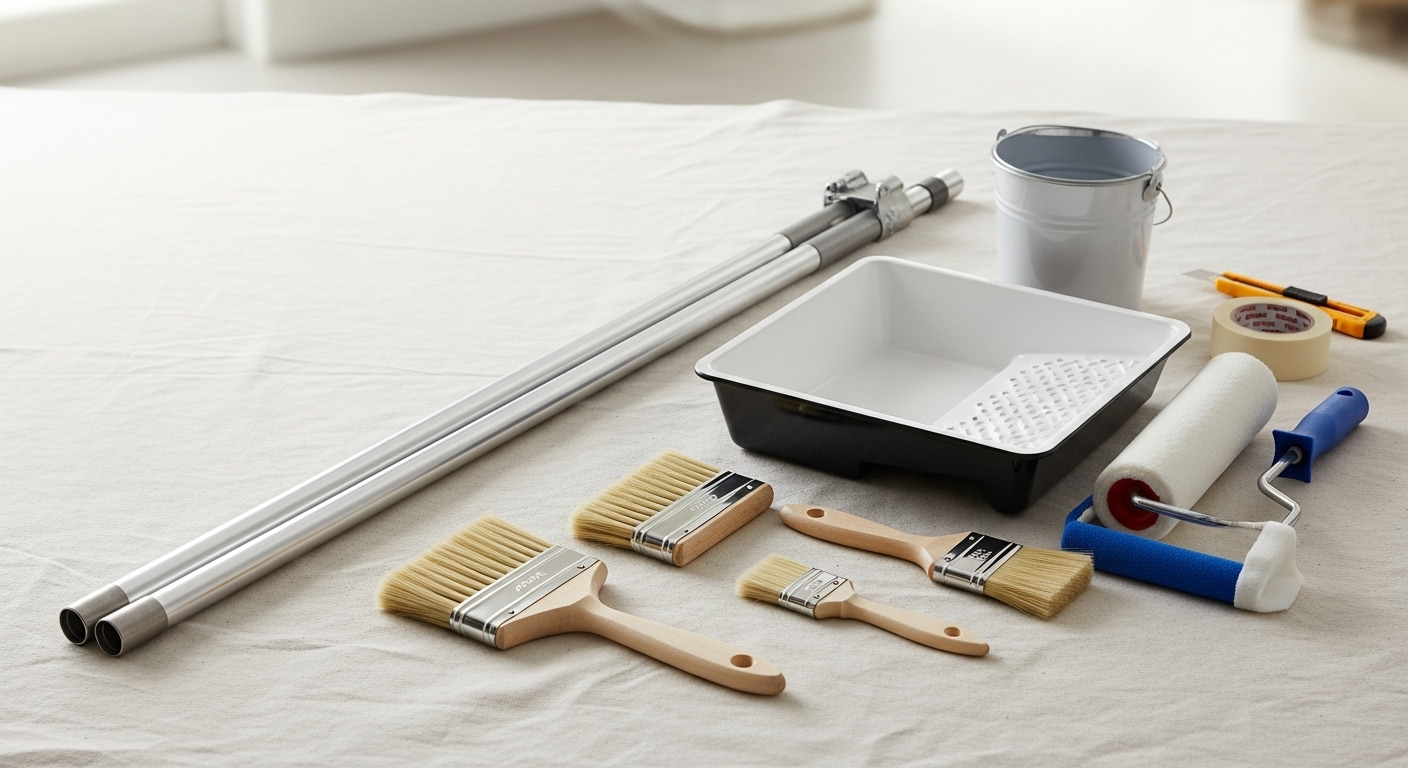
It is very important that you obtain the right equipment before starting the job to be able to reach high walls easily and, above all, safely:
Extension poles: In fact, they must be the only tool you cannot go without in a double-height area. Adjustable poles that extend can easily reach from 6 to 12 feet. Thus, with a huge extension pole, you’ll need to be on the ladder less frequently since ground-level painting is possible more often.
Ladders: You will need a strong and reliable extension ladder that can take your weight plus the weight of the items (paint and tools). Also, make sure it extends at least 3 feet beyond the highest point of the work, so you will have something to hold your hands on when getting on or down the ladder.
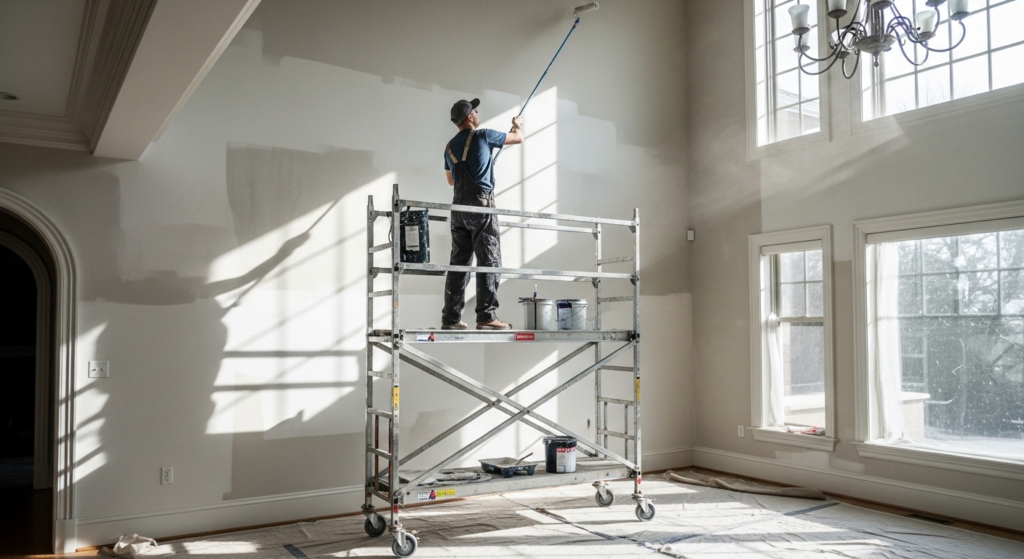
Rolling scaffolding: You can think of rolling scaffolding for that impressive two-story room, though. It is a very safe and steady platform, which you can set at various heights, so you work there rather than constantly going up and down a ladder.
Quality roller covers: 3/4-inch or thicker thick-nap rollers are to be used on textured walls so that you achieve perfect coverage even on the high surfaces.
Angled brushes: A 2.5-inch angled brush gives you great results when you want to do the ceiling line with a steady hand; plus, you can get great use out of it fitted to an extension pole.
Drop cloths and painter’s tape: First, cover the floor and trim with canvas drop cloths (your feet will be less sweaty since there is no plastic), and attach high-quality painter’s tape to areas you don’t want to be painted.
Paint tray with extension: If a paint tray is mounted on your extension pole, it saves you the trouble of going up and down continually.
Safety First: Proper Ladder Placement and Scaffolding Options
The higher up you work, the more important your safety measures become. Failing to follow these basic rules can cause you severe harm, which is why it is so important to adhere to safety standards strictly.
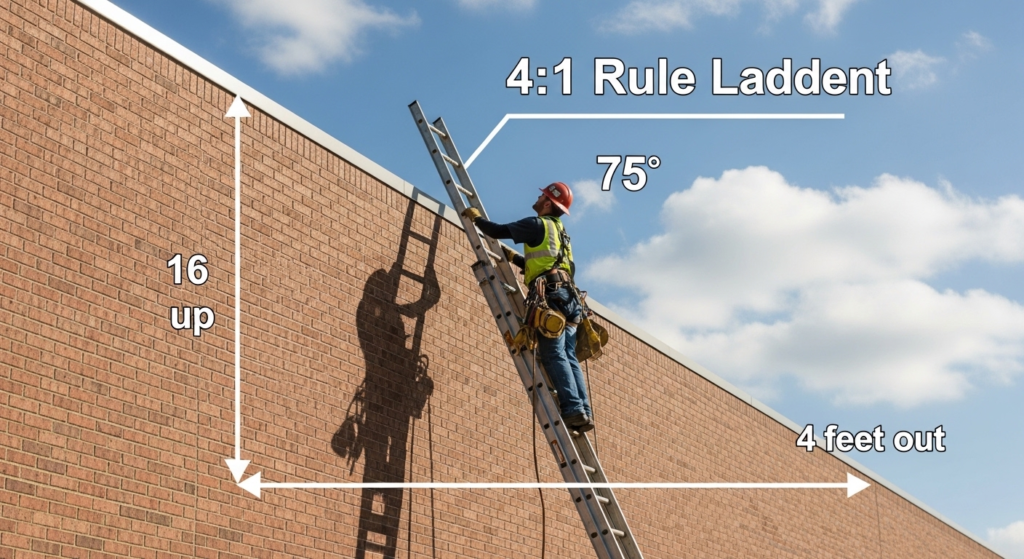
The 4:1 rule for ladder placement: The position of the ladder base is the first important step when you set up an extension ladder. The base should be placed away from the wall by an amount equal to ¼ of the ladder’s length. For instance, if the ladder will touch the wall at the 16th foot, place the bottom 4 feet from the wall. This will give the ladder a good, safe angle.
Maintain three points of contact: You want to be as safe as possible, so double-check that you always have two hands and one foot, or two feet and one hand, in contact with the ladder while either going up or down. You should never bring paint or tools while on the ladder; instead, use a tool belt or hoist your items up with a hand line.
Ensure stable footing: Don’t try to set up your ladder on any uneven or loose surface. Both rails of the ladder have to be evenly supported. You are risking an accident if you put the ladder on boxes, barrels, or other unstable things.
Keep clear of power lines: You should always maintain a safe distance from overhead power lines, and this distance should be no less than 10 feet. Also, if you have to work right next to electric sources, get a ladder whose rails are made of insulating material.
Never move an occupied ladder: As soon as there is a person on it, a ladder should not be moved. In fact, the risk of falling is greatly increased if the ladder is moved or extended while it is occupied.
Consider scaffolding for extended projects: If the task takes quite a few days, consider rolling scaffolding. It is a safe platform from which to work and provides some degree of comfort, such that the painter will be less tired. You will not have to keep going up and down, and at different intervals, steadiness can be gained from an elevated working position.
Preparation Steps: Protecting Floors, Cleaning Walls, and Taping
Painting goes very smoothly, and the outcome is very clean if you follow the prescribed preparation procedure thoroughly.
You either need to completely clear the room of furniture or cover it. Because you are working in a double-height room and your paint splashes and drips will be able to fly a long way, you shouldn’t risk the possessions below your working area. The entire floor, which can be covered with canvas drop cloths, will be protected as well since these cloths are able to absorb ”spills” much better than plastic, which can easily slip underfoot as well.
Wipe your walls well before paint is applied if you want to get rid of dust, cobwebs, and grease. You can use a wet cloth or a mild detergent solution, and after that, the walls will need to dry fully. Paint high-ceilinged areas after the dust has been cleaned, since dust tends to gather up in the corners and along the line of the ceiling.
Press painter’s tape all around the ceiling line, baseboards, door frames, and window trim. The tape should be pressed so firmly that there is no space for paint to leak through. When you have tall window(s), use a tape applicator that is fixed to an extension pole for the take-up of your fingers so that you won’t need to use the ladder just to tape the top edges.
Patch the holes with spackling compound, and after it dries, sand it well before continuing with the painting. You can make your paint job even more professional-looking if you prime the patched spots.
Step-by-Step Guide on How to Paint a 2 Story Room Efficiently
Since you have everything ready, it is a good time for painting. If you paint in the order below, you will get a great result:
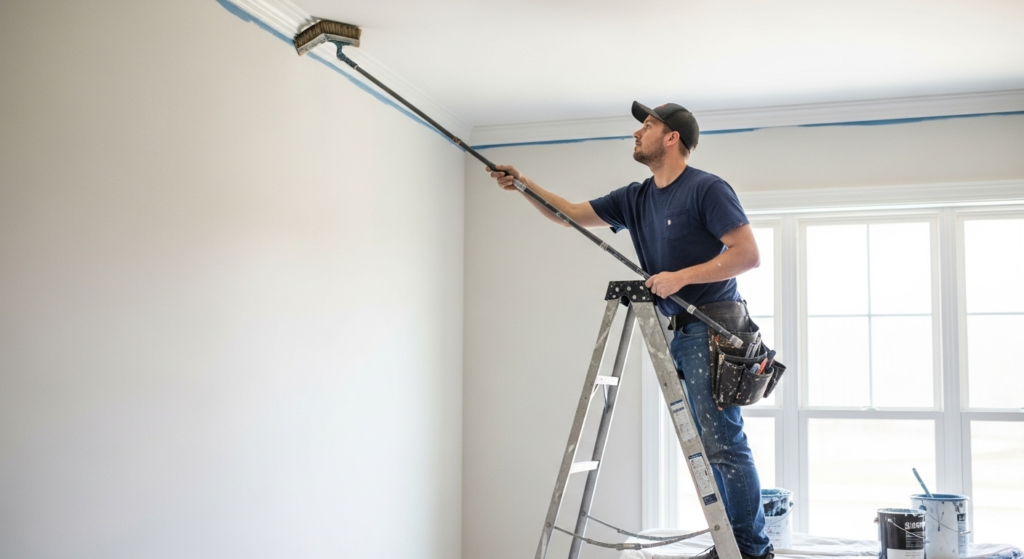
1. Start with the ceiling: You would be wise to paint the ceiling first if that is what you plan to do. You can use an extension pole with a roller to do the ceiling in an overlapping W-motion in sections that can be easily handled. In this way, when the paint dries, there will be no lap marks.
2. Cut in the perimeter: You will be able to make about a 3-inch line that will be the border by cutting in. You can decorate with an angled brush, which is located on an extension pole, the ceiling line, corners, and any other architectural features. You can also create a clean edge with a roller afterwards.
3. Roll the upper walls: Always, one should start at the top of the walls when painting and work their way downwards, section by section. Uniformly loading your roller, you make sure that both painting and removing the paint from the roller in a W-shape are done. Avoid lifting the roller until you have filled the entire W shape that you just painted. Try to overlap each section as you go along, while the edge is still wet, in order to avoid overlap becoming visible seams.
4. Work in vertical sections: Imagine your walls are divided into vertical sections about 4 feet in width. Once you have finished the top through to the bottom of the first section, you can move on to the following one. Working with wet edges, it ensures that no overlap marks are left.
5. Paint the lower walls: When the upper portions have dried, carry on with the lower parts and complete the job. It is possible that these areas can be reached from the floor, so this way, painting becomes faster for you.
6. Apply a second coat: To get consistent coverage, most homeowners do two coats. Follow the same steps, but after the first coat has completely dried, apply the second coat.
Pro Tips for Cutting In at the Ceiling and Managing Paint Drips
You elevate the quality of your work by bringing it to the level of a professional when you have mastered these skills:
Load your brush correctly: You should only dip the bottom third of the brush into the paint. Then, you should tap (not wipe) it against the edge of the container. This will give you enough paint for a good finish without any drips.
Use the “feathering” technique: When cutting in the top, the brush should be angled in such a way that the bristles are fanned a little bit. The brush should be drawn down the wall with very little pressure. You will see that the sliding brush leaves a smooth transition between the joints.
Work from a stable position: If you are cutting in with a ladder, make sure that you are set up in such a way that you can comfortably reach a 3-foot section without overstretching. It is a much better solution to move around the area regularly and not to overreach, which guarantees your safety as well as the quality of what you are doing.
Catch drips immediately: If you want to clean drips very easily, keep a damp rag handy so you can wipe drips before they dry. In double-height rooms, paint comes down, and by the time the work is done, the lower wall is covered with paint drip marks.
Thin high-gloss paints slightly: Add one pint (maximum) of water per gallon of semi-gloss or high-gloss latex paint if you want to thin them and make the brush strokes less visible. If you want to keep the opacity and the tint, such thinning won’t be the best solution.
FAQs
How long should I wait between coats when painting a two-story room?
For latex paint, it is best to wait at least one hour before you can decide if you want to, or you can put on a second coat. However, for an even better result, let the paint dry for three to four hours. Alkyd (oil-based) paint requires overnight drying. For painting late in the day, make sure you are finished three to four hours before darkness so that moisture will not affect the film before it dries enough.
Can I rent scaffolding instead of buying it?
Many home improvement stores and equipment rental centers rent out rolling scaffolding for a day or for a week. Rental prices depend on the particular store and the area in which it is located, and generally, the cost is $50-$150 per day. Therefore, if the project will last more than one day and the room is large and double-height, it is only reasonable to rent the scaffolding.
What’s the best way to avoid lap marks on tall walls?
One way to get rid of lap marks is to keep the edge wet at all times and to work in small sections so that the paint you have laid on is still wet. Quickly enough is the key here if you want to perform this trick just right. Painting slowly and carefully only means that the paint will dry before you get to it again. Besides that, many manufacturers recommend that if you use an extender or conditioner with your paint (added according to the directions), it will slow down the drying, which in turn will give you more time to work under warm conditions.
Do I need to prime before painting a two-story room?
If your walls are perfectly fine and you are just changing the color slightly, then definitely a high-quality paint-and-primer-in-one may be enough for you. However, in case you have done some repairing work, if a certain dark color is to be covered by a light one, or if you are painting new drywall, then, for the best results of coverage and adhesion, using a dedicated primer is the way to go.
How do I minimize neck and shoulder strain when painting overhead?
Use extension poles for as much of your overhead work as you can so that the time spent on a ladder staring up is kept to a minimum. Make sure that you take breaks into consideration and that you change the job (rolling, cutting in, working at floor level) so that your body is in a different position. You can also look at the option of renting scaffolding if you will be extensively working overhead, since this will give you a more natural/neutral posture.
Bringing Your Vision to Life
Knowing how to paint a 2 story room can be a deciding factor and turn a project that seems scary into a doable weekend. The right equipment, safety as the first priority, and a step-by-step work method will help you to beautify spaces that are so dramatic that for doing this decorating work, only professionals are invited.
The bottom line is that patience is your best friend—when you are in a hurry at a great height, there is a very real risk of an accident, and your work can be of very low quality too. By being methodical, permitting your equipment to have a rest, and, when the need arises, for the bigger job, renting scaffolding equipment, always keep these themes in mind. After a few years, you and your beautiful double-height room will thank each other every day for the care that has been taken.
Your transformative journey awaits. So gather your gear, organize your space safely, and dive into the fulfilling process of turning new ideas into reality.